Today we live in a digitally connected world with over 5.52 billion people using the internet across the globe. However, language barriers still exist in this connected world with only 20% of the world population fully proficient in English. With a majority of the content on the internet available in English the need to localise app content is essential for wider audience reach and engagement. OTA localization has garnered immense popularity among Flutter app developers over the last few years because it enables developers to develop apps for Android and iOS using a single codebase while keeping the application lightweight and efficient.
The Need for App Localisation
96.2% internet users access the internet through mobile phones with mobile phones accounting for 61.6% of the world’s web traffic. In the last one decade easy access to mobile data has also given rise to the popularity of super apps also known as the ‘Swiss army knife’ and for a good reason. These apps offer a wide range of services within a singular user-friendly application making everyday life easy. As per Gartner, 50% of the global population will be using super apps by 2027. Tata Neu, Uber, PhonePe, Paytm are some of the popular super apps. The intent of creating these apps is to make routine activities of everyday life useful. However, only when users can understand the language will they be able to fully utilise these apps to their advantage. PhonePe for example has worked towards localising the app to cater to Indian customers and its success is no secret. Businesses must localise their app in multiple languages to ensure a wider customer reach, engagement, and customer loyalty. With technology evolving at a rapid pace apps also have to be updated frequently and this is where developers need tools that enable them to carry out real-time app localization.
Understanding App Localisation
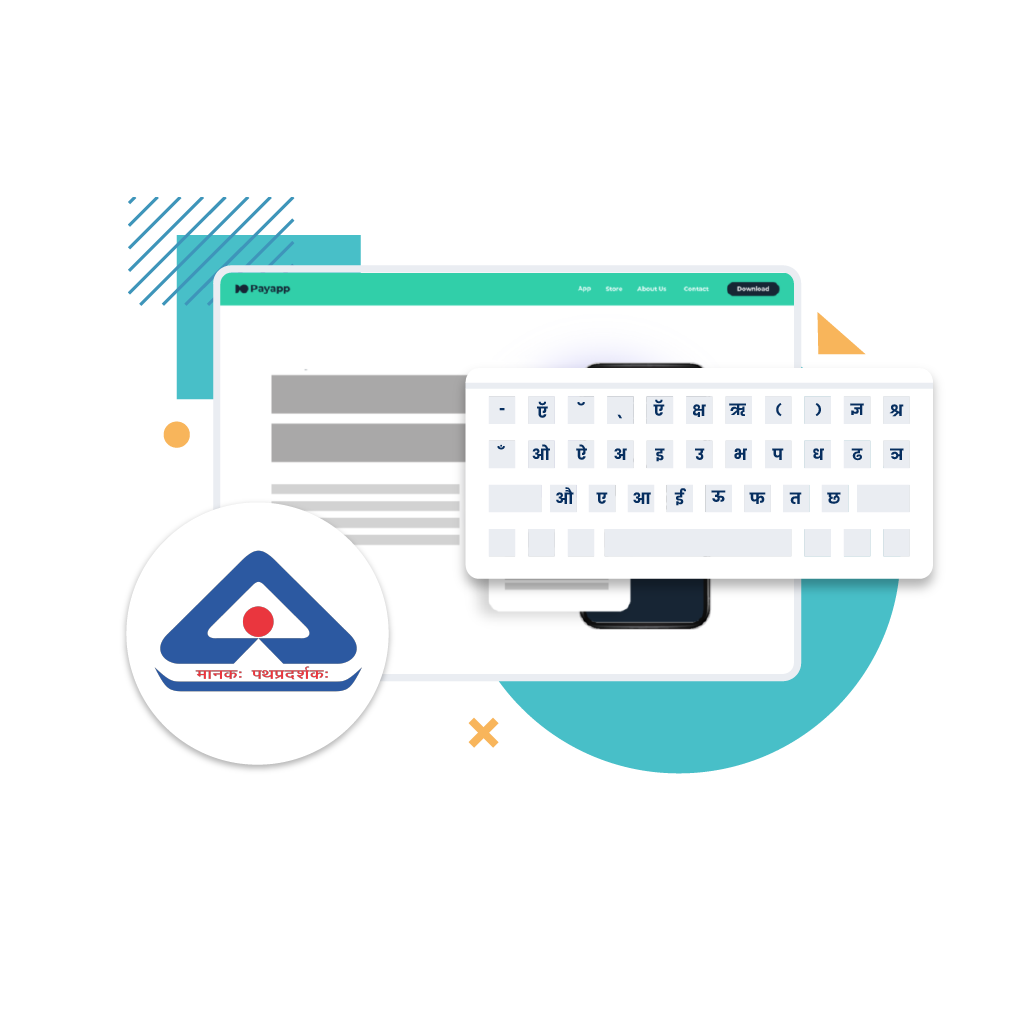
App localization refers to the process of building a single mobile application in multiple languages. Localising an app makes it linguistically, culturally, and functionally suitable for a specific target market or audience in a different region or country. It also ensures delivering a highly personalised and engaging customer experience. When starting your app localisation journey translating the content is just the first step. Do keep in mind to include other components such as cultural context, regional regulations, image localisation, date and time formats, including local terms specific to the region for a meaningful connection, availability of customer support and documentation in a local language and more. Simply put, focus on localising customers journey end-to-end
However, with constant updates happening on apps especially ecommerce apps and banking apps localising them can be a daunting task. This is true also for static content or content within the app memory. So how does one ensure localising these updates in real time, more so in case of multilingual apps. Even for static content, storing all the content translated in multiple languages on the app itself can make the app heavy and impact its loading time and overall performance significantly hampering customer experience. Enter OTA (Over-the-air localisation), a fast and lightweight way for localising apps.
Over-the-air Localisation (OTA) with Anuvadak
Reverie’s Anuvadak now provides app localisation via OTA SDKs (software-development kits) which facilitates instant updation of content on your apps, adding new languages and more. Picture this – you release a new app with a new feature set, widgets, and content. The user downloads this new app and all the new upgrades are instantly visible in the app. Some of this data like the header labels etc. is static content and gets stored in the user’s mobile device. However, after releasing the app you realise that there is a minor spelling mistake or a wrong terminology or wrong translation that’s appearing when the user loads an app in a local language. Earlier, any such change would mean making these corrections at the backend, releasing the new version of the app, and getting it approved by Apple and Google playstore. Only when the user would download this new version the changes would get reflected.
However, by installing the OTA SDK in the app a lot of time can be saved. Now, if at all any minor corrections have to be made, spellings corrected or any changes made to the static content it can be done in Anuvadak’s web editor, generate an over-the-air bundle and release it to the end-users. This bundle gets automatically downloaded when a user opens the app and the new updated content will be visible to them. Since the app has Anuvadak’s OTA SDK, when a user activates the app it will automatically connect to Anuvadak’s OTA to check for any updates since the last version of the app was released. Given below is the pictorial representation of how Anuvadak OTA localisation works.
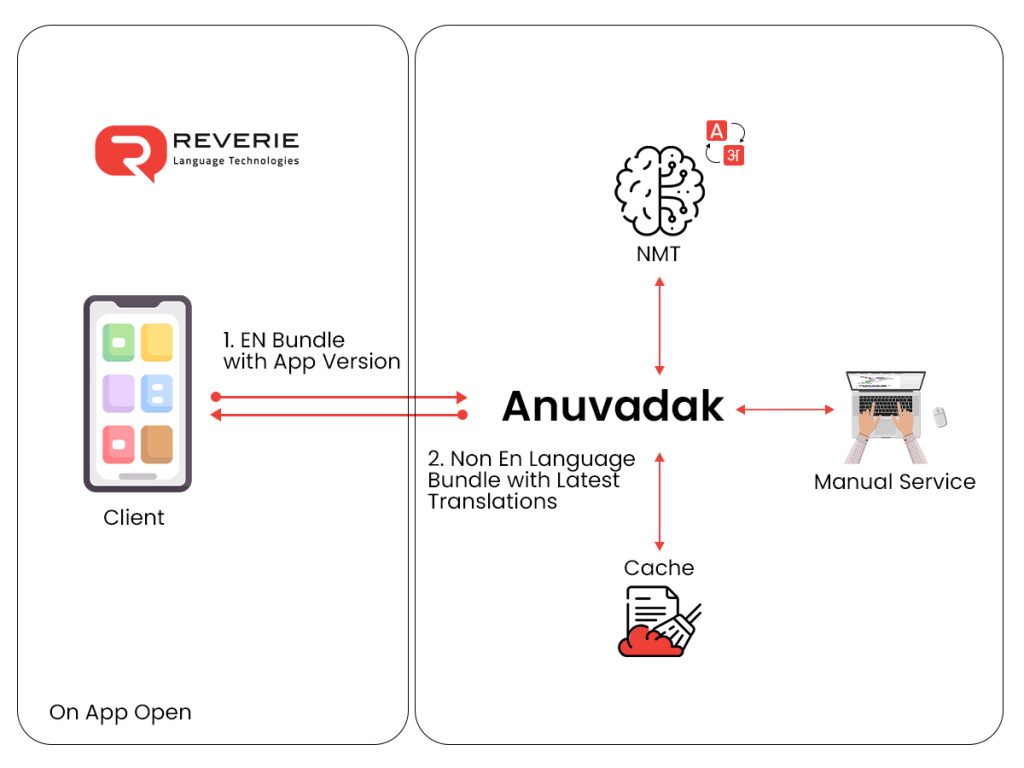
Fig 1: A flow of OTA Localisation for Apps
What makes OTA lightweight is the fact that it contains only modified data since the last app release ensuring quick download and good app performance. With over the air updates for Flutter now available with Anuvadak localising your Flutter apps is a breeze.
Decoding Flutter
Flutter is an open source framework for app development launched by Google in the year 2018. Flutter supports app development on six platforms – iOS, Android, Windows, MacOS, Linux, and the web. The convenience of building apps for different platforms from a single codebase makes flutter appealing and a popular choice. In addition to this localisation in flutter becomes a seamless process thanks to the robust support it provides through its intl package.
A Step-by-Step Guide to App Localisation in Flutter for Anuvadak
Step 1 : Setting up a project in Flutter
Create a new flutter project using the following command:
flutter create multi_lang_app
Navigate to the project directory using the following command:
cd multi_lang_app
Step 2 : Enabling Anuvadak localisation in Flutter
Open pubspec.yaml and add the following dependencies for localisation.
dependencies:
flutter:
sdk: flutter
flutter_localizations:
sdk: flutter
intl: ^0.19.0
http: ^1.1.0
sqflite: ^2.0.0+4
path_provider: ^2.0.13
provider: ^6.0.0
shared_preferences: ^2.0.15
package_info_plus: ^4.0.0
args: ^2.3.1
AnuvadakFlutter:
path: “path for Anuvadak Flutter SDK”
assets:
– lib/l10n/en.arb
#this to read en.arb in realtime to maintain translation records
Run Flutter pub get to install dependencies.
Step 3 : Create language specific files
Next we will need to create language specific files for each language. Let’s say we have to create an English, Hindi, and Marathi app. These are the steps to follow.
- Create a directory for localisation files called l10n (localisation) in the lib (library) folder.
- Add ARB files (Application Resource Bundle), ARB files contain translated strings for each language. Create two files inside the l10n directory:
en.arb (for English)
Step 4 : Configuring localisation in pubspec.yaml
Add the following command to configure localisation.
flutter:
generate: true
assets:
– lib/l10n/
Run Flutter pub get to sync the asset files.
Step 5 : Generating localisation files
Generate the necessary dart files from the ARB files using the following command:
dart run AnuvadakFlutter:runGenerate.dart
The above command generates a lib/generated directory. Within this directory will be a file anuvadak_localisation.dart that contains localisation logic.
Step 6 : Initialize the Api Key and Notifiers in the Void Main Class
To get the Anuvadak API key click here.
void main(){
await AnuvadakManager.getInstance().initialize(Constants.anuvadakApiKey);
runApp(
MultiProvider(
providers: [
ChangeNotifierProvider(
create: (context) => LocaleProvider(languageCode: _selectedLanguage),
), // pass the lang code u want to launch the app in start
// Add other providers here as needed
],
child: MyApp(),
),
);
Step 7 : In My App State add the following localisation delegates and set the locale in which localisations will work for
GlobalMaterialLocalizations.delegate,
GlobalCupertinoLocalizations.delegate,
GlobalWidgetsLocalizations.delegate,
AppLocalizations.delegate
class MyApp extends StatefulWidget {
const MyApp({super.key});
@override
_MyAppState createState() => _MyAppState();
}
class _MyAppState extends State<MyApp> with WidgetsBindingObserver {
@override
Widget build(BuildContext context) {
final localeProvider = Provider.of<LocaleProvider>(context, listen: false);
localeProvider.setLocale(Locale(_selectedLanguage));
AppLocalizations.isprod = true; //Anuvadak Prod/Dev Switch
return MaterialApp(
debugShowCheckedModeBanner: false,
title: ‘My App’,
theme: ThemeData(
primarySwatch: Colors.blue,
),
navigatorKey: navigatorKey,
home: SplashScreen(sharedId: “”, uri: “”),
localizationsDelegates: [
GlobalMaterialLocalizations.delegate,
GlobalCupertinoLocalizations.delegate,
GlobalWidgetsLocalizations.delegate,
FlutterQuillLocalizations.delegate,
AppLocalizations.delegate
],
supportedLocales: [
Locale(‘en’, ”), // English
Locale(‘hi’, ”), // Hindi
Locale(‘bn’, ”),
Locale(‘or’, ”),
Locale(‘mr’, “”),]}
Step 8 : Use the Localized Strings
You can use the localised string from the generated class like this
Text(
AnuvadakLocalisation(context)
.blogCategoryOrSubject,
style: TextStyle(
fontSize: 16,
fontWeight: FontWeight.w400),
),
If you have not used generation code you can call the Key from en.arb like this
AppLocalizations.of(context).translate(‘Join mission’);
Step 9 : Change Language in Runtime
Make sure you have added the Notifier in the Main Function of the Application
final localeProvider = Provider.of<LocaleProvider>(context, listen: false);
localeProvider.setLocale(Locale(language));
Step 10 : Receive Callbacks (Optional)
You can receive callbacks of translations Calls and animate your UI during the Translation Calls
AnuvadakManager.getInstance().setCallBack(
onUpdateSuccess: () {
},
onError: (error) {
},
onUpdateWithError: (error) {
});
The Road Ahead
Today apps are being used for everything from shopping to booking hospital consultations. But with more and more people accessing the internet in their native language, building apps that are multilingual is essential. 70% users will disengage and abandon apps that have longer loading times. This underscores the need to develop apps that are lightweight, fast to load, and easy to develop. Flutter’s easy to use framework coupled with Anuvadak’s Flutter app localisation via OTA enables developers to achieve this. To know more about how you can localise your Flutter app with Anuvadak get in touch.
Anuvadak Integration on the Srujanee Flutter App
The Srujanee Flutter app is now live on Playstore. Srujanee is a multilingual blogging platform. Anurag Behera , Founder Srujanee said “We are thrilled to announce the integration of the Anuvadak Flutter SDK into the Srujanee app, marking a significant milestone in delivering a truly localized user experience. With this cutting-edge integration, Srujanee now supports all classical Indian languages, including Sanskrit, offering seamless access in 11 Indian languages.
What sets this integration apart is its dynamic adaptability—any changes to the app’s UI texts are instantly reflected with accurate translations in the respective languages, eliminating the need for frequent app releases on the Play Store.
This implementation underscores our commitment to bridging language barriers and creating an inclusive digital space. Businesses looking to tap into India’s diverse linguistic landscape can benefit immensely from the Anuvadak SDK to deliver a localised user experience that resonates with their audience.”